Back-Pocket Chicken and Rice Skillet Dinner
I’m excited to start a new series called Back-Pocket Meals where I will share my families most go-to recipes. These are the meals that we lean on when we are low on groceries, ideas, out of time, and energy, and yet, they are what we all want and crave. They are quick, and easy, and completely adaptable. I’ll be sharing with you the base recipe, but also giving you ideas for how to make adaptions based off of your pantry and your preference.
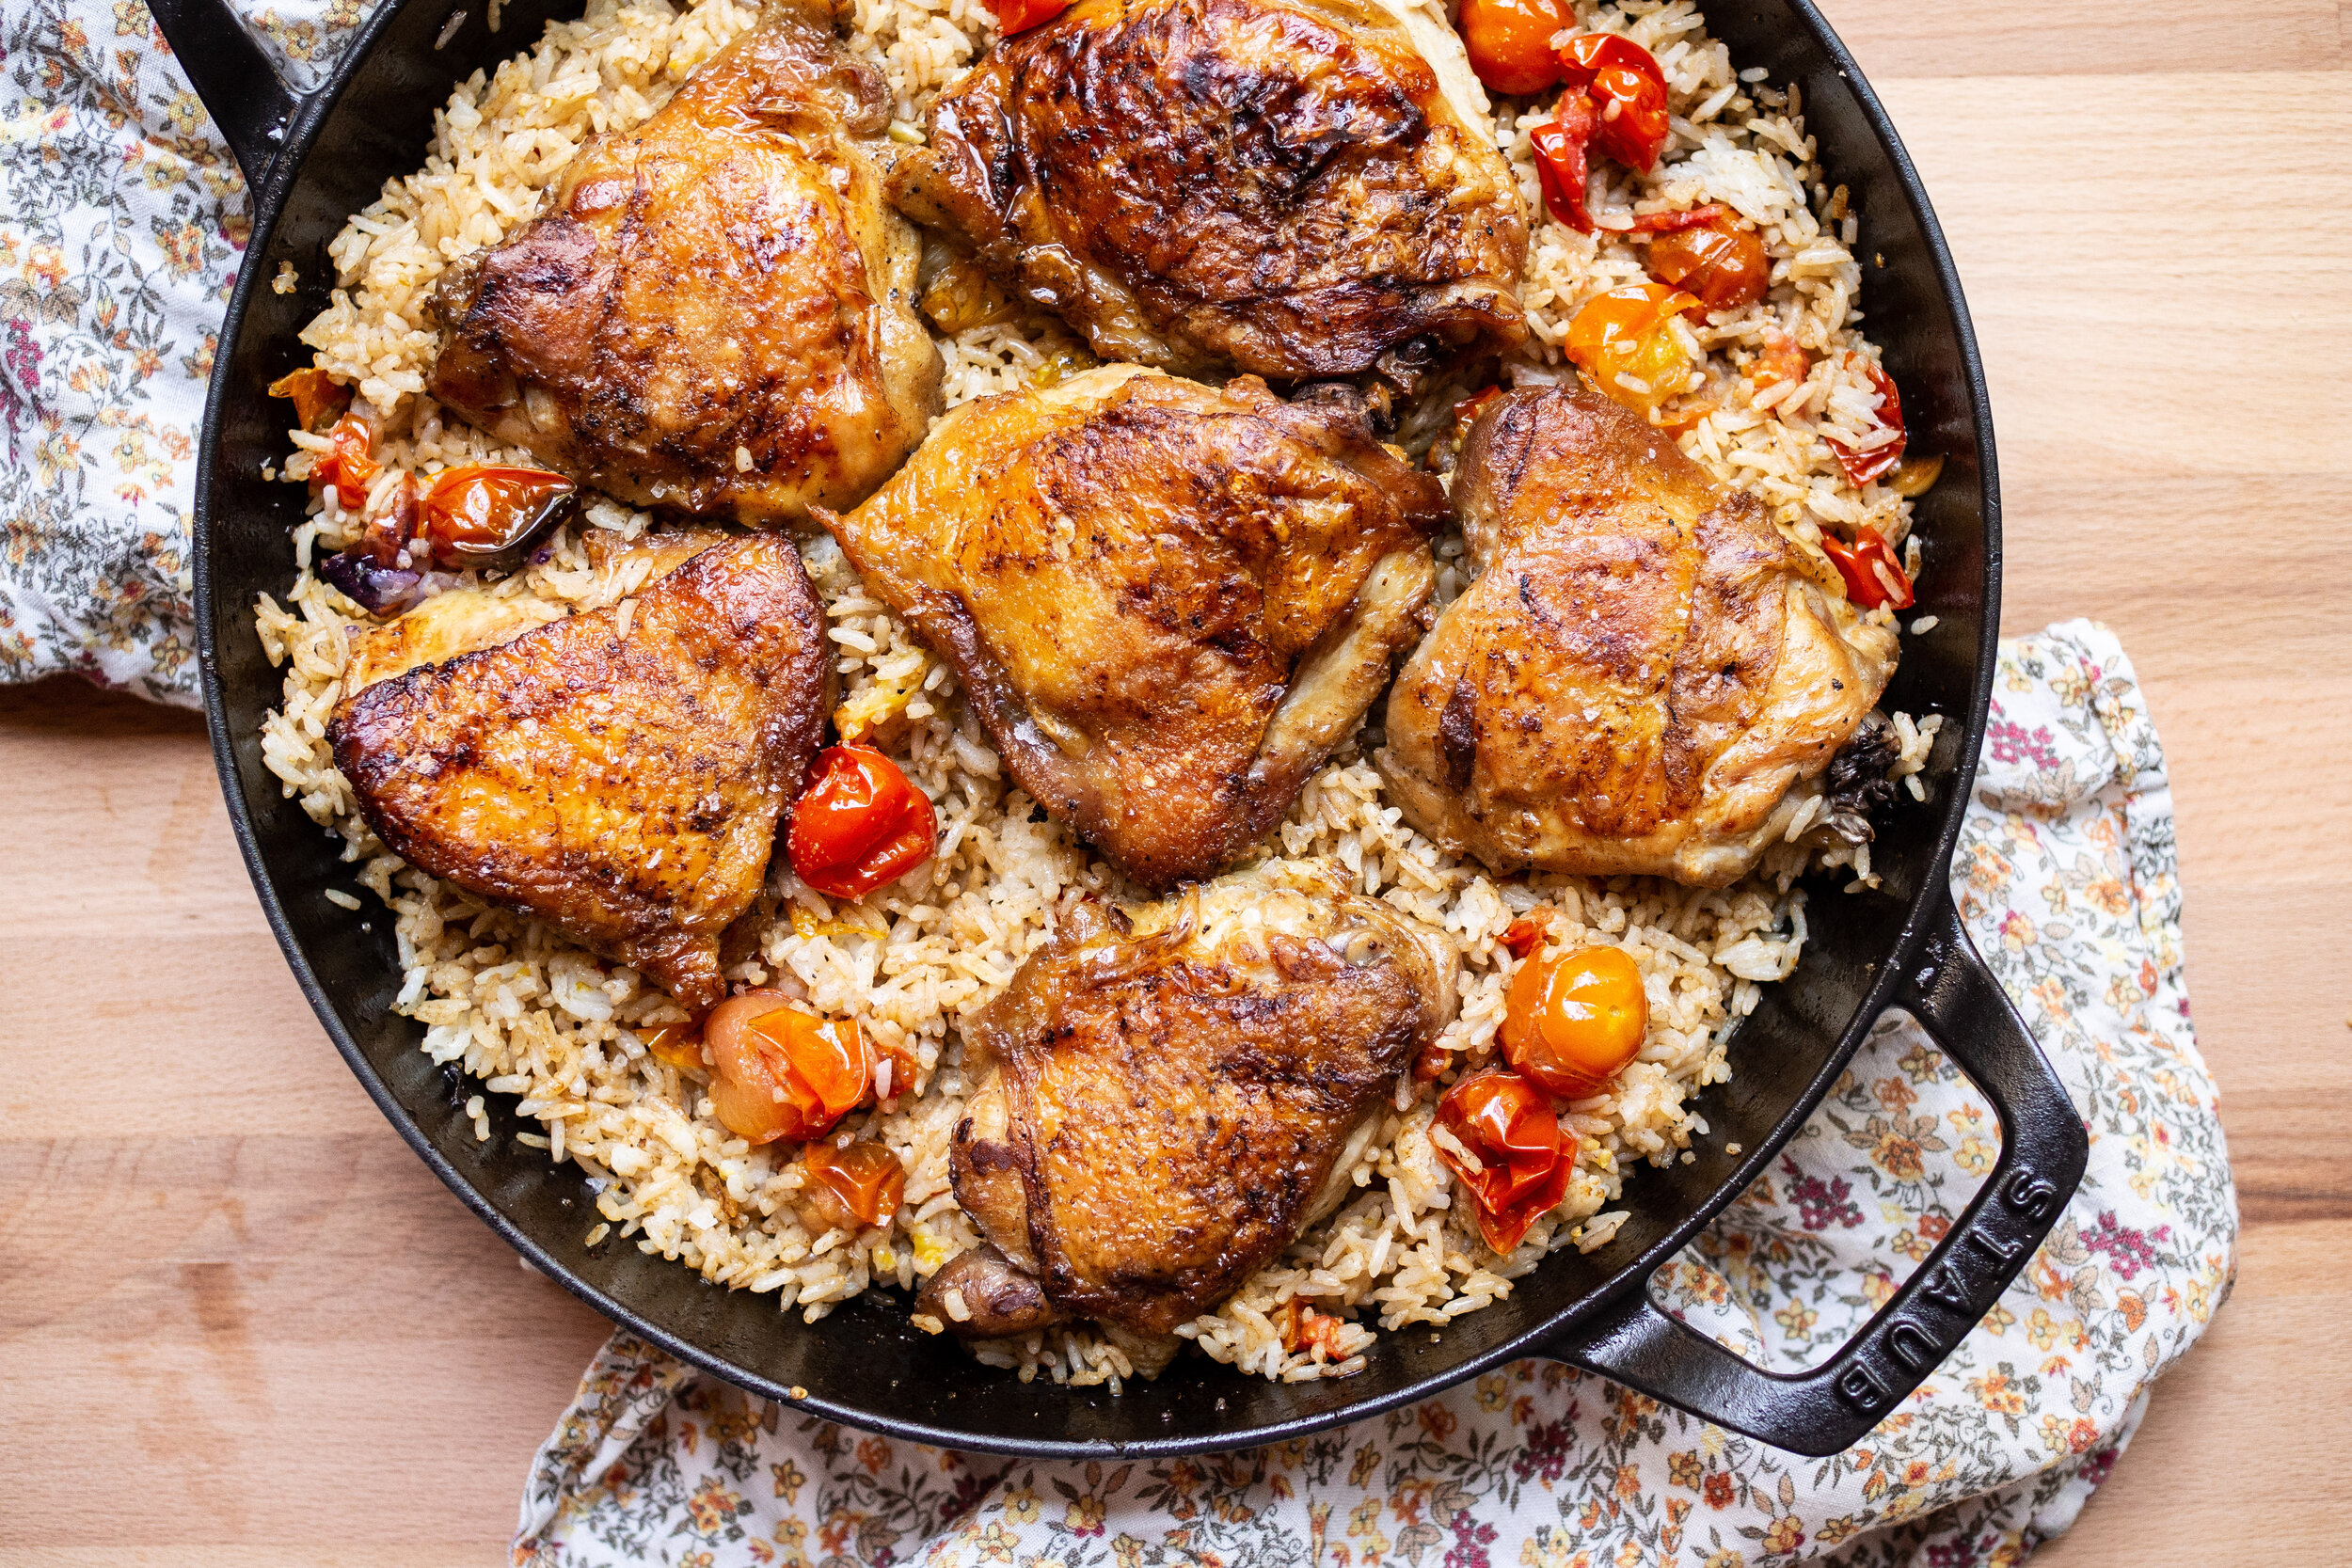
First up is this Chicken and Rice Skillet Dinner! This is a huge family favorite. We are big chicken and rice people, and this skillet dinner is the perfect comfort easy meal where you can add in whatever vegetables you have around that need to get used up. We love making it with cherry tomatoes right now as our garden is booming with them but this is also fantastic with mushrooms, zucchini and kale!
Note, I have tried this with other grains, even though we love it with rice. So far I have tested farro and quinoa, and both have worked great.
I hope you enjoy the recipe, and stay tuned for more Back-Pocket Meals to come.


Back-Pocket Chicken and Rice Skillet Dinner
Serves 6
INGREDIENTS
3 cups cooked white jasmine or short-grain rice
6 bone-in chicken thighs (legs or drumsticks)
Kosher salt
2 tablespoons oil (I like to use coconut oil, but avocado or vegetable will work too)
3 garlic cloves, thinly sliced
1 cup chicken broth
ADD-IN OPTIONS *pick one
2 bunches of greens, ribs removed, and torn (kale and Swiss chard are favorites)
2 cups cherry tomatoes
2 cups chopped mushrooms
2 cups chopped broccoli, cauliflower or Brussels sprouts
2 cups chopped squash
STEPS
*Note, cook your rice first. We use a rice cooker at home, but I am also a fan of the pasta method. Bring a pot of salted water to a boil, add rice, and cook in boiling water until tender, drain and set aside.
Preheat oven to 425 degrees. Pat the chicken thighs dry with a paper towel and generously salt both sides. In a large cast-iron skillet, heat 2 tablespoons of oil over medium-high. Place the chicken skin side down and cook for 7 minutes until skin is golden brown. To help ensure a nice even layer of crispy-ness, place another cast iron pan, or something heavy and oven proof on top of the chicken while it cooks. After the chicken skin is crispy, transfer the whole thing (including the heavy pan on top) to the oven and cook for another 8 minutes. Once the chicken is nice and crispy, remove the pan, flip over the chicken, and cook for another 5 minutes. Your thermometer should read at 165 degrees. This could be less or more time depending on what cut of chicken you used. Remove the chicken from the pan and place on a wire rack (this helps maintain that crispy-ness that we are going for).
Place the cast iron skillet, and all of the good chicken fat, back on the stove at medium heat. Add in your garlic cloves, stirring occasionally, until golden, about 2 minutes. From here, add in your 2 cups of chosen vegetable. The more dense the vegetable, the longer I let it cook. The idea is you want it to soften and caramelize. If I’m adding in greens, they’ll go fo just about 3 minutes, compared to if I’m using tomatoes or mushrooms, they might go for 5-7 minutes. It’s really a personal preference of how you like your vegetables sautéed. Once the vegetables are where you like them, add in the chicken broth, stirring and scraping up all of the good bits. Cook for about 2 minutes, and then add in your 3 cups cooked rice. Stir often, until the rice absorbs all of the good chicken fat and broth and begins to crisp on the bottom. I like to stir, then spread the rice out, allow it to sit for just a bit, and then stir and repeat. We are all about the crispy rice at home to go with our crispy chicken. Season the rice with salt, and add the chicken thighs back on top of the skillet, and serve.